Step-By-Step Guide for Getting a Golf Course Lawn

A beautifully-striped lawn mowed tight like a golf course fairway. This describes the dream of most lawn care fanatics that want their home lawn to look like a golf course. We'll outline the process you can follow to create the lawn you see above.

It's taken several years of blood, sweat, and fertilizer to get the lawn to this point. Although it looks pretty good, we're always looking for ways to improve this golf course lawn. This guide, combined with a consistent approach, will have your lawn looking like a golf course before you know it.  

We aim to show you how to reduce the time to make your lawn look like a golf course from several years to just four months.

The lawn started as Tifway 419. It’s the cultivar most commonly installed by contractors in my area. Over the past few years, we've overseeded the lawn with Arden 15 Bermuda to get a darker color while reducing water and fertilization requirements. In the photo above, the lawn is mowed at 0.75”.

1. Top Dressing Your Lawn

Top dressing lawn

For your lawn to look like a golf course, it first has to be smooth like a golf course. Despite how flat your lawn may look to the naked eye, once you start mowing it lower, all the bumps, dips, and weird undulations will show themselves. To overcome this challenge, you’ll need to topdress your lawn.

Top dressing is applying a layer of sand to the turf to smooth out the uneven surface. There are several top dressing types, from primarily organic material to pure playground sand. We used a 70/30 blend of river sand and organic material on this lawn. This has the advantage of leveling the turf while adding organic material to the soil. The best material we've used for lawn leveling is the Soil³ leveling mix.

A pure organic mix will eventually break down, bringing you back close to where you started. While you should apply enough top dressing mix to reduce the low areas, be careful not to over-apply. The grass tips should still be exposed, allowing them to receive sunlight for faster recovery.

The process used for applying the top dressing was as follows:

top dressing invoice for golf course lawn
  1. Scalp the turf to a height below 0.5.”
  2. Remove as many of the grass clippings as possible
  3. Aerate the turf
  4. Apply a 14-7-14 starter fertilizer (the brand doesn’t really matter)
  5. Apply top dressing mix
  6. Use a shop broom to work the dressing mix into the turf. 

Top dressing is back-breaking work. Be sure to enlist the help of friends and family so the process goes faster. Alternatively, you can find a company that provides this service in your area. 

Check out this video if you'd like to see what goes into top dressing a lawn. We show how the process works using heavy equipment and the manual process. Both methods produce great results. 


If you decide to use a service, expect to pay about $5 per square foot, depending on what they do. This lawn is approximately 12,000 square feet, so the initial lawn level and top dress cost $2,425.00.

Approximately three weeks passed between top dressing and the lawn being completely green.

Related: How to Level a Bumpy Lawn Like a Pro: 7 Simple Steps


Core Aeration and Verticutting

Core aeration and verticutting are methods for opening the canopy and removing thatch. We typically aerate in late March or when the grass starts coming out of dormancy. 

Core aeration punches 2 - 4” deep holes into the turf and removes plugs of soil. This allows fresh air and moisture to enter the soil, improving water and fertilizer uptake. It also strengthens grass roots. You can rent a core aerator or pay for a service to do it for you. 

Verticutting thins out the turf by removing built-up thatch. It also promotes new growth since the grass is sliced into 2–3” long sections. Each of these sections begins new growth of its own. The result is a much thicker and healthier turf in the weeks following the process. We recommend doing both aeration and verticutting at least once per season. To speed up recovery, apply fertilizer after the procedure.

Depending on your lawn size, expect to pay $60–$90 for core aeration and $100–$150 for verticutting.


2. Choose the Right Lawn Mower

Greensmaster 1600

After top dressing, the mower you use is the most crucial aspect of acquiring and maintaining golf course grass at home. Most lawns don’t look like a golf course because the owner is using the wrong type of mower to cut the grass.

A traditional rotary lawn mower is analogous to swinging a long knife to cut the grass. This hacking motion tends to tear the grass instead of cutting it cleanly. Traditional mowers are much more likely to scalp the turf as mowing heights become lower. 

Any unevenness in the surface will cause the cutting disk to dip, creating ugly-looking semicircles in the lawn.

For the mowing heights we’re after (0.5”-1.25”), you'll need to use a reel lawn mower. A reel mower (also called a cylinder mower) cuts the grass by trapping the grass between the reel edge and the bed knife. This process cuts the grass, similar to how scissors cut paper. They’re much friendlier to the turf since the grass isn’t injured as much during mowing. 

Almost all reel lawn mowers can also install a front roller that neatly lays the grass flat during the cutting process. This is what creates those glorious stripes we’re after. 

Our current reel lawn mower is a Toro Greensmaster 1600. It is a golf course lawn mower that cuts tee boxes and approaches. If you're searching for the best reel mower out there, it's tough to beat the Toro Greensmaster 1600. To find one at a good price, search Google for "Toro Greensmaster 1600" or "Toro GM1600". 

A pre-owned Greensmaster in good condition will cost between $1,500-$3,500. A Toro Greensmaster priced in the $3,500 range will typically have lower hours (under 500) and will arrive freshly serviced. That way, you're ready to go for an entire mowing season. Local auctions or one of the online marketplaces are good sources for finding these reel mowers for sale. 

Another option is to find out which company your local golf course leases its reel mowers from. These places will often have off-lease reel mowers for sale at attractive prices. A bonus is that you start a relationship with the company that will likely service and/or repair your reel lawn mower. Regardless of where you get yours, a powered reel mower is a fantastic bit of kit that will produce the best possible cut. 

If the price of a powered reel mower is intimidating, you can always go with a manual push reel mower. The Scotts push reel lawn mower produces an excellent cut. There are also good push reel mower options from Fiskars and Earthwise, but the Scotts push reel mower is the one we have the most direct experience with.

While the Scotts will work for most lawns, the Toro Greensmaster or Tru-Cut C25 / C27 are better options. The reel turns much faster, so you obtain a pristine cut even at lower heights. It’s also less work to operate a powered reel lawn mower than a manual push mower. If you decide to buy one, be sure to get a front roller since it’s required to create those beautiful stripes.


3. Choose the Right Fertilizer

We prefer to use a blend of synthetic and organic fertilizers. For the synthetic, we use a medium-release fertilizer from Lebanon Turf. The specific product is their Humic Max 16-0-8 with 8.9% humic acid and 35% MESA. MESA is their proprietary additive that feeds the lawn for extended periods while not causing excessive growth. One bag of this fertilizer is enough to treat 15,000 square feet of Bermuda. 

Soil testing is essential for determining the best fertilizer for your lawn. The soil test kit that we like and recommend is the one by MySoil. The kit is simple to use, and we show how in this video.


For a slow-release fertilizer, Mirimichi Premium Organic is a good option. It’s an OMRI certified organic fertilizer and contains a bit of iron, humate and beneficial bacteria to promote a deep green color. Because it's slow-release, there's little chance of burning your lawn. Your neighbors will hate the smell, but it does wonders for your soil — creating a greener lawn.

If you want the best option for your lawn, consider Lebanon Turf Humic Max since it will improve your soil quality while feeding the grass.

This is a good general annual fertilization and lawn product application schedule:

  • Early March: Full Humic Max application
  • Early March: Spring Pre-Emergent application
  • Mid April: Full Humic Max application at 3 lb per 1k rate
  • Late June: Full Humic Max application at 3 lb per 1k rate
  • Late June: Full Humic Max application at 3 lb per 1k rate
  • Mid-August: Final Humic Max application of the year
  • Late August: Fall Pre-Emergent
Mirimichi 4-4-4 organic and Country Club 14-7-14 to feed golf course lawn


Related: When Is the Best Time to Fertilize Your Lawn?


4. Mowing Frequency

A big reason why golf courses look the way they do is mowing frequency. The shorter the grass, the more frequently it has to be mowed to maintain the desired height. To have a green lawn between mowing sessions, it’s recommended that no more than 1/3 the length of the grass be removed. It also reduces the stress on the turf, but in my opinion, this is secondary. Regardless of what you do to it, Bermuda is pretty difficult to kill.

This is the reason why putting greens are usually mowed daily, while fairways are cut every other day. That’s what it takes to maintain green turf below 1”. For the homeowner wanting a backyard putting green, this means mowing at least three times per week, which is certainly not a small commitment.

During the summer months (June–September), we typically mow the lawn every other day. As a general rule, the more often you mow your lawn, the better it will look. Check out this video if you'd like tips on improving your mowing and getting amazing lawn stripes. 


5. Pre-Emergent and PGR

chapin sprayer and pgr bottle

Due to the low height of the cut and mowing frequency, we don’t really have issues with weeds. That said, in mid-February, we apply pre-emergent, and on some lawns, we also re-apply in late April. The brand of pre-emergent we use is Prodiamine. If you’re looking for a more cost-effective option that can be applied using a backpack sprayer, look no further than Prodiamine WDG. It’s an industry standard when it comes to pre-emergent for home lawns. We show how to apply it in this video.


The other product we regularly use is PGR (Plant Growth Regulator). It inhibits the grass stalk from growing quickly while allowing the leaf to flourish. This has two significant benefits. First, it reduces the mowing frequency because the grass isn’t growing vertically as quickly. Second, you will get a darker green because the leaf isn’t being cut off as frequently. Older leaf is a darker green than new leaf.  This video covers the benefits of PGR and gives you easy-to-follow tips for getting the best results.


The brand of PGR we use and recommend is called Primo Maxx. It comes in a 4 oz container, perfect for anyone wanting to try it without spending too much. Just 4 oz of Primo Maxx is enough to treat a 4000 square foot lawn four times in one season.

Depending on how much rain you receive, you should apply PGR every 3 - 4 weeks to control growth. Our first application is performed in early May, followed by additional monthly applications until September. PGR will save you about one mow per week and provides the benefit of a greener lawn.

We use this backpack sprayer to apply the PGR. It supports higher pressures, has better construction, and includes an assortment of sprayer tips to give the best result. If you prefer a more cost-conscious option, this sprayer from Chapin is also good. A quality sprayer definitely helps create a tightly woven turf that will make your home lawn look like a golf course.

Another strategy for using plant growth regulator is to spray every 2 weeks at lower rates. We detail the process in the blog post below.

Related: How Plant Growth Regulation Can Make Your Lawn Thicker and Greener 


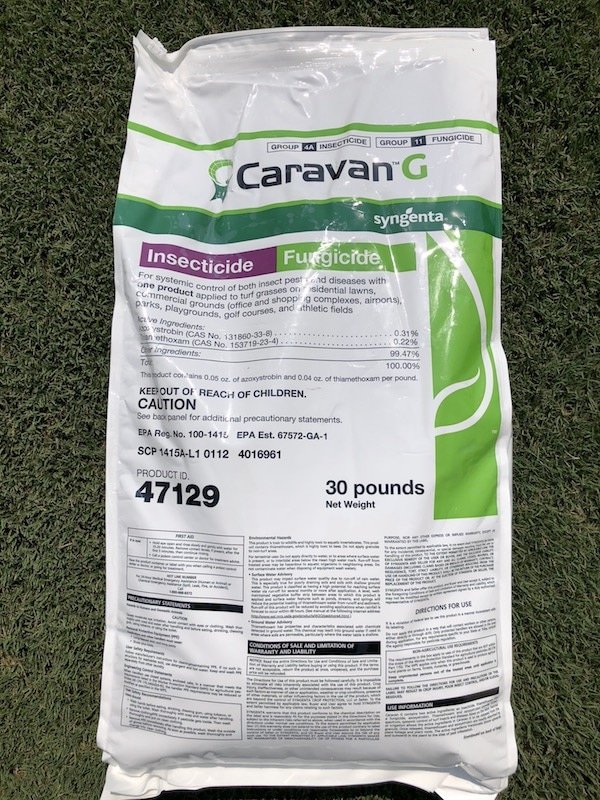
6. Fungicide and Insecticide

caravan-g golf course lawn herbicide
Acelepryn G

There are a couple of options for keeping grubs, armyworms, fire ants, and other pests away. We recommend and use a product by Syngenta called Caravan G. It’s a combination of insecticide and fungicide. It does an excellent job of keeping the nasties away and eliminates lawn fungus-like brown spots. One bag covers around 8,000 square feet.

For fire ants, we recommend Advion Fire Ant Bait. This granular product is easy to apply and performs well for extended periods.

If you'd like a fungicide to treat a broader range of lawn fungi, we recommend Headway G from Syngenta. Keep in mind that this product is strictly a fungicide. It contains two active ingredients, which makes it more effective.

If you go with Headway G, you’ll need to use a standalone insecticide to keep grubs and armyworms out of your lawn. The best insecticide you can get in this space is called Acelepryn. Check out this article on eliminating and preventing armyworms using this product. It's available in liquid and granular forms as Acelepryn SC and Acelepryn G, respectively.

If liquid fungicide is more your thing, Pillar SC has you covered. It quickly controls 26 common lawn diseases while being easy to mix and apply.


7. Watering Frequency

Bermuda only needs about 1 inch of water per week during the summer months to stay happy. If there’s no rain, that means running your irrigation system. Depending on your lawn size, water will probably be your highest expense. You can use efficient irrigation to ensure you get the most out of your watering.


Lower watering requirements are one of the primary reasons we decided to switch to Princess 77. A new grass seed called Arden 15 was released to replace Princess 77. It grows in faster, produces a deeper green, and is more drought tolerant.

As of 2022, Arden 15 Bermuda grass seed has also been discontinued. Replacement options with good reviews are Yukon and Monaco. You can get get them on Amazon or Hancock Seed. Also, don’t forget to apply a good starter fertilizer along with the seed application to ensure the best possible results.


Tying it All Together

While it’s certainly a lot of work, the end result makes it worthwhile. Top dressing is by far the most challenging aspect of the process. Once you get past that, it becomes all about fertilization and mowing.

If you’d like a general calendar to follow that will mimic most of what we do, take a look here. Due to the monthly nitrogen application, using Primo Maxx plant growth regulator is HIGHLY recommended.

To determine the amount of product needed for your lawn, use our FREE lawn care product fertilization calculator.

Lawn Care Schedule Month-by-Month Breakdown 

FEBRUARY
    • Optional: Pre Scalp lawn
    • Perform a soil test. Results will dictate which fertilizer is best for your soil needs.
    • Before 5-day soil temp average reaches 55 degrees, apply   Spring Pre-Emergent - (Prodiamine or Dithiopyr)
      MARCH
      APRIL MAY JUNE JULY  AUGUST SEPTEMBER OCTOBER 

      NOVEMBER 

        Related: Your Ultimate Winter Lawn-Care Guide

        I hope you enjoyed reading how we transformed this lawn from boring to awesome in a short period. Read more golf course lawn secrets and tips in our DIY lawn care blog.

        Want more details, discounts to save money, and access to our private Facebook support group? Create a lawn your neighbors will envy using the process taught in the Golf Course Lawn Academy.

        You get:

        • 20+ Videos of Self-Paced Instruction
        • Exclusive Member-Only Lawn Product Discounts at the Golf Course Lawn Store
        • Access to our Private Support Community
        • Product Application Calendar
        • Access to Future Course Modules at No Additional Cost.